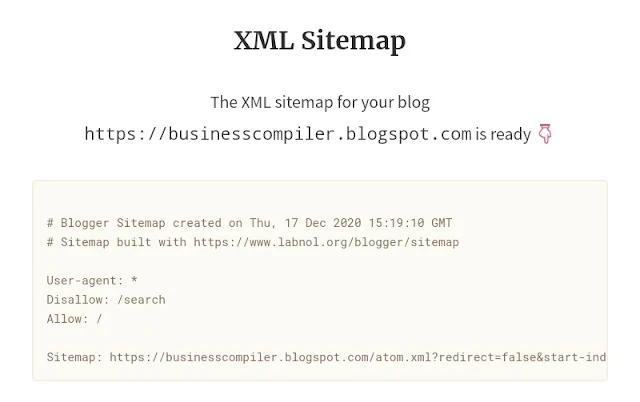
When I started blogging on blogger blogspot.com, Google crawler excluded most of my blog posts; more than 50% of my posts wouldn’t be indexed. You know, Google crawler crawling and indexing your blog and it’s posts is what can make your blog posts appear on search engines. So getting your posts crawled and indexed is the first SEO strategy. If Google crawler misses your new blog post at the time you are promoting the post on social media, Google may not index it again, if you don’t do something to facilitate the indexing. So, I started submitting my posts URL one by one to Google sitemap, yet I wasn’t getting the needed results. And Google on 14th of October, 2020 disabled manual one-by-one submission of post, page URL for indexing. I decided to make more research, I finally learned the best way to do it. That’s what I’m going to teach you right now!
XML SITEMAP
The best way to make Google better crawl on your blogger blog is to add XML sitemap to your blog. Google encourages using XML Sitemap, others for quick and optimal crawling. Google, Bing, and other search engines use XML Sitemap to discover and crawl some pages and posts on your site that their search bots may have missed during regular crawling. Therefore, XML sitemap helps Google crawler to properly index your blog site.
XML sitemap generator divides all your blog posts in blogger blog into groups — 500 posts in each group — and generates XML feed for each group. This will make search engines to discover every post on your blog because it is now in one XML sitemap with about 500 other posts. You may ask, “what if my blog posts are not up to 500 or can’t be divided into equal 500s?” It doesn’t matter the number of posts on your site so long as there are reasonable number of posts. 500 post in one group is just a class interval, which means more than 500 posts can’t be in one group, and you can’t have another group unless the first group is up to 500.
This XML sitemap works for both blogger hosted and self hosted blogs. But we are going to focus on how to implement it on blogger blogspot blogs.
Generate and Add XML Sitemap To Your Blogger Blog
1. Log in to Sitemap Generator
2. Enter your blog URL (your blog site address)
3. Click on Generate Sitemap to generate the XML file for your sitemap
4. Copy the whole text
5. Open your blog on Blogger.com, click on Settings at the dashboard. Look for Enable Custom robots.txt option under Crawlers and Indexing, and select it.
6. Paste the XML sitemap in the custom robots.txt. Change Disallow:/Search to Disallow:/None as you can see in the picture below. This will let Google crawler crawl all the pages in your blog including Labels (Categories), which have "search" in the URLs. If, not the Google crawler will be blocked/ disallowed from crawling and indexing "search" pages URLs.
7. Save changes.
Now, you have exposed your enter blog structure to Google crawler and other search engines. They will automatically discover your XML sitemap file through the robots.txt file for better crawling and indexing.
Check Your Custom Robots.txt File
To check your robots.txt, type your sites URL on web browser and add "/robots.txt".
Example: http://www.yourblogurl.blogspot.com/robots.txt
This will display the code in your custom robots.txt file
Read also: How to Use IndexNow Let Bing, Yandex Crwal and Index Your Content Instantly
- Log in to search.google.com/search-console/sitemaps?
- Click on Enter sitemap URL, enter your sitemap URL. Example: https://yoursiteurl.blogspot.com/atom.xml?redirect=false&start=index-1&max-results=500
- Submit


